- Date
Automate Task Numbering in Microsoft Planner
Automatically assign unique identifiers to tasks in Microsoft Planner using Power Automate.
Lennart Gastler
Softwareengineer

We use Microsoft Planner in various projects to track our tasks. While Planner offers many features for classic task management for teams, one feature we miss is unique numbers for each task.
In Microsoft Planner, tasks do not automatically have a unique number. This makes it difficult to reference tasks uniquely. We like to use these numbers for communication, you often hear or read “Have you seen Task 54” or “In Ticket 123 it says…“. With unique numbers, tasks can be tracked and discussed much more easily.
Solution: Microsoft Power Automate
With Microsoft Power Automate, it is possible to create a flow that automatically assigns a unique number to each task. We have created such a flow that assigns a consecutive number to each newly created task in a specific plan and prefixes it in the title.
This way, each task has a unique number that can be used for referencing.
For instance, a task named “Setup Planner” will be transformed into “[TASK001] Setup Planner”.
Setting Up the Flow Yourself
In the following step-by-step guide, we explain how to set up the automatic numbering flow in your own Planner.
Download and Import the Flow Package
- Download the pre-built automation flow created by our team as a starting point
- Navigate to make.powerautomate.com and log in to your Power Automate account
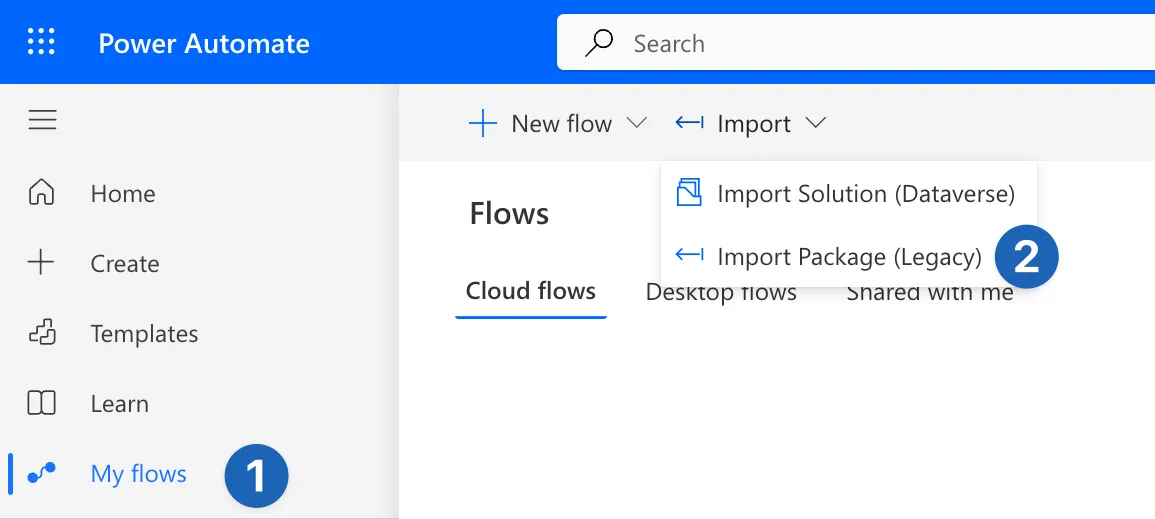
- Select “My Flows” (1) on the left sidebar
- Under “Import” choose “Import Package (Legacy)” (2) and upload the downloaded ZIP file
Configure Flow Settings
Once uploaded, customize the flow settings (1)
- Under Choose your import options select Create as new to update whether to change the import setup
- Modify the flow title to suit your preferences, typically reflecting the plan name for clarity

Configure the Planner connection (2):
- Under “Related resources” select “Select during import” to set up a connection, either choose an existing one or create a new one
- if you need to create a new Planner connection by searching for “Planner” and following the instructions. Refresh the list, select the newly created connection, and proceed with the import
- Now you can “Import” the flow package

Update Flow Actions
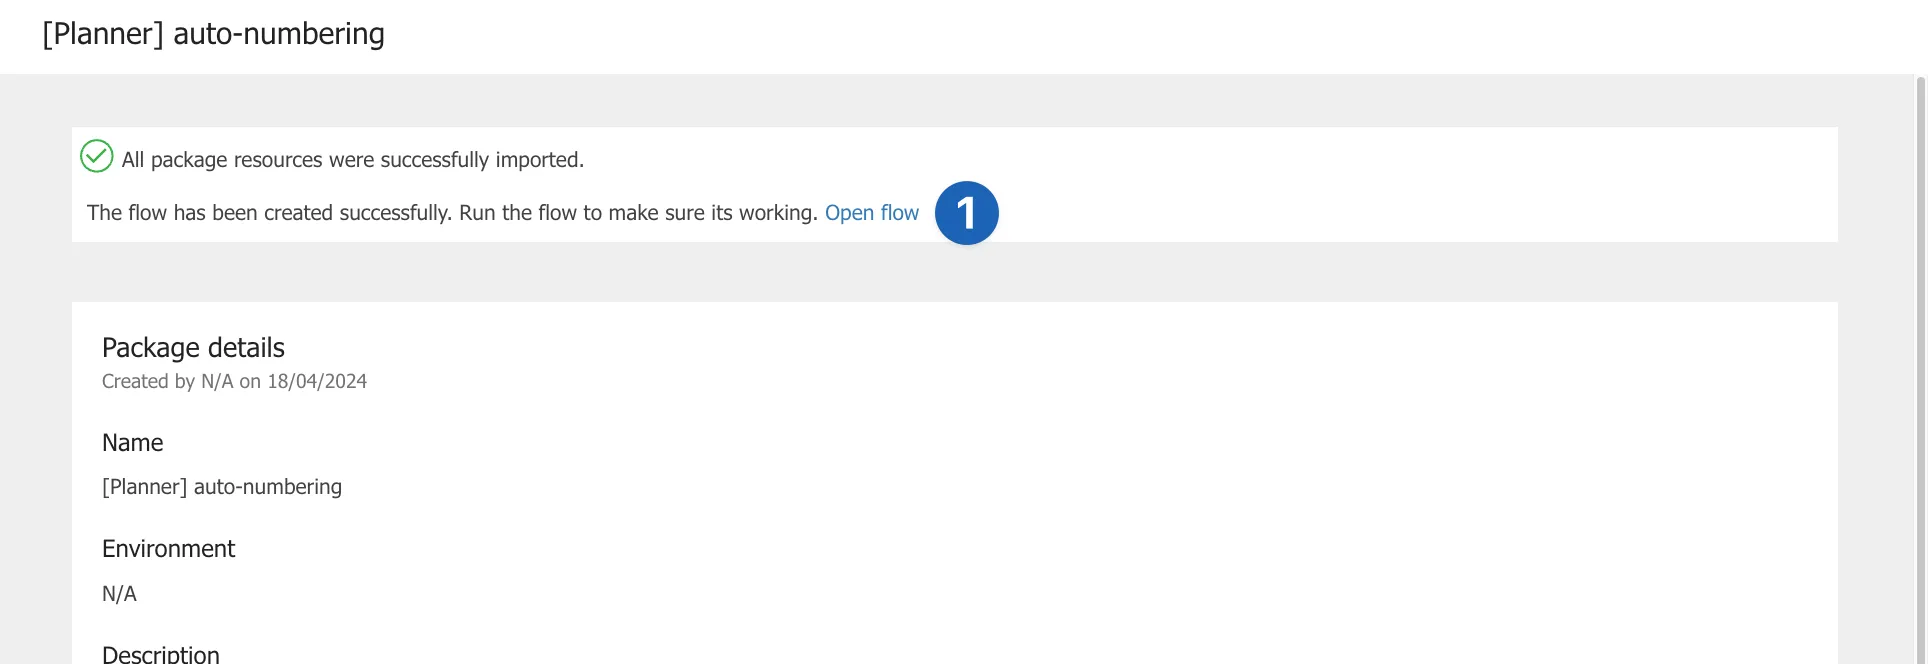
After importing, open the flow (1) to update the settings
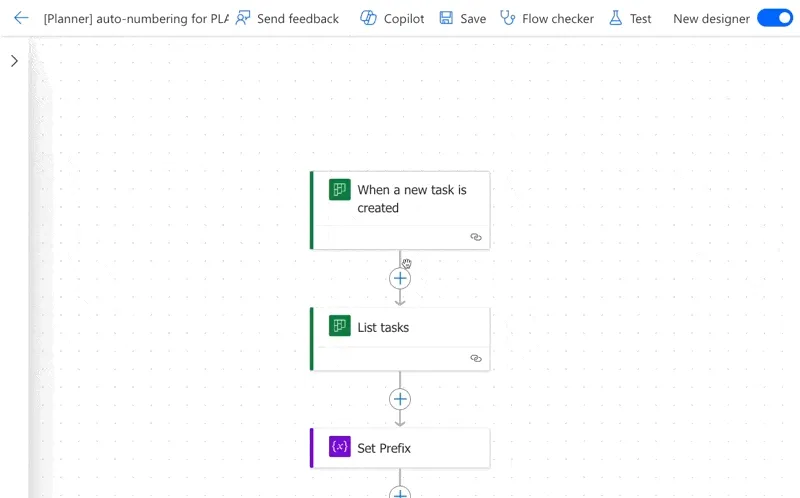
Update the settings for the first three actions:
Since we are using the flow for a specific Planner plan, you need to adjust the Group Id and Plan Id values accordingly. This ensures that the auto-numbering system is applied to the correct plan.
-
For “When a task is created” and “List task” actions, remove existing values for “Group Id” and “Plan Id,” and select the desired Group and Plan for auto-numbering. Make sure to repeat this step for both actions.
-
Update the prefix in the “Set Prefix”, the default is “PREFIX”, the title will be updated with the prefix and the task number.
- f.e. if you task is named “Setup Planner” and the prefix is “TASK”, the title will be updated to “[TASK001] Setup Planner”
Save and Test the Flow
- Save the flow settings and ensure there are no errors.
- Test the flow by creating a new task in your selected Planner.
Note that it may take up to 5 minutes for the flow to execute and update task titles.
By following these steps, you can implement an auto-numbering system for tasks in Planner.
In conclusion, using a Automator Flow enabels you to number all tasks inside Microsoft Planner. Your feedback is important to us. For any questions or further assistance, feel free to reach out at lennart.gastler@bluvenit.de.